


Handmade Butternut Squash Tortellini

In my heart, no food really lives as large as fresh, stuffed pasta. Immediately after saying that I want to say I can’t commit, but nope, I’m sticking to it. Growing up, my dad made a lot of fresh pasta. It was something he really enjoyed. He particularly enjoyed Biba Caggiano’s various Northern Italian recipes. This meant some incredibly delicious tortellini. His filling had a little of everything, veal shank, beef, mortadella…and so much more. It is one of the most nostalgic bites in the world to me, and really, nothing can top it. However, the first time we went to our favorite, now super-popular Italian restaurant here in Austin, Red Ash, I bit into their agnolotti, and was immediately transported to my dad’s tortellini. Deeply savory, I genuinely feel I could taste how long everything took to make. Anyway, one quality these two pastas shared: they were fresh and handmade, but still, somehow al dente. Truly, my dream. This handmade fresh butternut squash tortellini, I’m super happy to say, is a member of club fresh-yet-al dente, as well.
Making some variation of butternut squash filled pasta, whether it be ravioli, agnolotti or tortellini is something I’ve done every fall for these past few years. Now, it’s something of a household staple. As soon as the weather starts to turn, Ben usually requests it. Let me tell ya, I am no snooty DJ in my kitchen- I love a request. In fact, Ben’s food requests have often help me stretch kitchen muscles I didn’t know I had. Life advice no one asked for: Hitch your wagon to someone who uncovers your strengths- especially the surprise ones. The difficult to discover ones that require you stretching those muscles you didn’t know you had.
Fresh pasta is a new kitchen muscle stretched for so many of us. Everything truly good that I’ve ever made was slightly intimidating. You’d better believe my batch of pasta when I made this recipe was worlds apart from my first attempt. That’s true for most things in the kitchen.
I remember watching my dad having a blast many a Saturday afternoon starting his sauce, rolling out his pasta. He made it look so fun. Having the chance to do that totally on my own was a childhood dream. Yet, the first time I tried to make pasta, I was so intimidated. I believe I was 21. I schlepped some flour onto my countertop, very close to the edge, made a well, and plopped in my eggs. I read no books. I watched no videos. Then, I promptly sent my eggs cascading over the countertop and onto my shoes with the first whipping motion of my fork. I remember calling my mom, very upset with my pasta snafu, and she told me about how she vividly remembered my dad chucking batches of pasta dough in the trash, dropping eggs out of the well in his flour and onto the floor, too. I laughed and immediately felt better. He had that much fun making pasta and was that skilled at it, and screwed up so many batches himself. Personally, I find that incredibly encouraging. Because he has not physically been with us for what will be 16 years at the end of this month, I have to look to these memories, patchworked together by my mom, my sister and I. This particular little pasta-patterned memory quilt was one that kept me making pasta from that night when I was 21, to now at 34, and I think of my dad every. Single. Time. While this tortellini is veg-forward (I mean, there is bacon), I think my dad would approve of this recipe big time.
As us kitchen tinkerers do, I set out to perfect my filling this year, and I’m very happy with the results. The dough, however, needs no perfecting, because this recipe begins with the perfect pasta dough recipe of Marcella Hazan, which gets lovingly kneaded into silky perfection. Then, after a much needed rest (for the dough), passed through a pasta machine until you can see your hand through it. Those sheets of perfection get liberally dusted with flour, trimmed, cut into squares, then filled. Speaking of filling…
Let’s talk about a filling that sings with cozy autumnal goodness. First, butternut squash gets tossed with herbs, plenty of salt and crushed red pepper, and roasted until nicely soft and slightly golden brown. While that’s roasting, we sauté a flavorful mirepoix of carrot, celery, and shallot in butter, then we toss in some garlic, herbs, and a little pale rosé wine (because that’s what I had but white wine is great) to cook down. That all gets thrown into a food processor, along with the butternut squash, some mascarpone and Parmigiano Reggiano cheeses, crispy smoky bacon, lemon zest, and plenty of s+p. That mixture gets pulsed into silky goodness, then placed in tiny dollops atop our trimmed sheets of dough. We cut them into squares, fold, and shape the pasta, cook for barely a minute, and toss in an easy-as-pie pan sauce.
These tortellini are, again, perfectly al dente but still silky. The filling is lightly sweet and bursting with root veg goodness, but given layers of complexity through the wine-laced mirepoix, smoky bacon, slightly spicy chili flakes, creamy mascarpone, and nutty Parmigiano.
It’s fresh pasta. No one claimed quickness. The best things in life take time, and we have officially entered cozy season, where recipes that require time and love reign.

A couple tips for new pasta makers…
(Check out this helpful reel of this recipe on my Instagram!)
Knead, knead knead. If you’re committing to making fresh pasta, commit to kneading the full time required for silky, smooth dough. Many recipes and books will tell you 10 minutes. However, I find that first-timers tend to take a little bit longer to fully knead the dough into silky goodness. A few years back, I taught many a pasta class, and I’ll just say that people really did not want to knead, haha. We’re creating dough, by hand, out of thin air- it takes a little time.
The dough will look pretty shaggy before it looks silky and beautiful. To piggyback on the first note, it really requires a lot of warmth from your hands, and working with the heel of your hand to get it to the flexible, pleasant state we want it in prior to rolling out.
Don’t overload your pasta roller. Whether you’re using a hand-crank machine (LOVE that), or an attachment for a stand mixer like I am, I divide my dough into quarters, and form it into a kind of flat puck, where I flatten out the edges.
Generously flouring your dough while rolling it out is a fantastic idea. Not generously flouring your dough could result in it sticking to the machine, and tearing. If this happens, though, no biggie! Pasta dough can actually be very forgiving with a little re-kneading and, again, generous flouring.
In this recipe, I incorporate the eggs into the flour in a large mixing bowl. After the dough is workable, I turn it out onto a floured surface. I understand this is not how the Italian nonnas do it. Traditionally, you pile your flour onto a big wooden board, make your well, crack in your eggs, mix, incorporate, and knead there. The bowl just adds a little security that your ingredients won’t go flying if you’re not a seasoned pasta maker. Hey, I often use a bowl just to avoid a mess, and I’ve been doing this awhile.
With that, get into something cozy, because it’s pasta making time.
Handmade Butternut Squash Tortellini
(makes roughly 50 tortellini)
For the pasta (Recipe by Marcella Hazan from The Essentials of Classic Italian Cooking):
(makes 1 1/2 lbs pasta)
2 c flour
4 eggs
For the filling:
6 c butternut squash, cut into 1 1/2” dice
1/2 t rosemary, chopped
1/2 t thyme, chopped
1 t red pepper flakes
Kosher salt and freshly cracked black pepper, to taste
Extra-virgin olive oil
5 strips bacon
1 stalk celery, diced, about 1 cup
1/2 c celery leaves, diced
1 carrot, diced
1 shallot, minced, roughly 3/4 c
6 cloves garlic, minced
1/2 c Parmigiano Reggiano cheese, grated
1/2 c mascarpone cheese
1 t sage, minced
1 t rosemary, minced
1 t thyme, minced
1/2 t lemon zest
1/4 cup dry white wine, or dry pale rosé
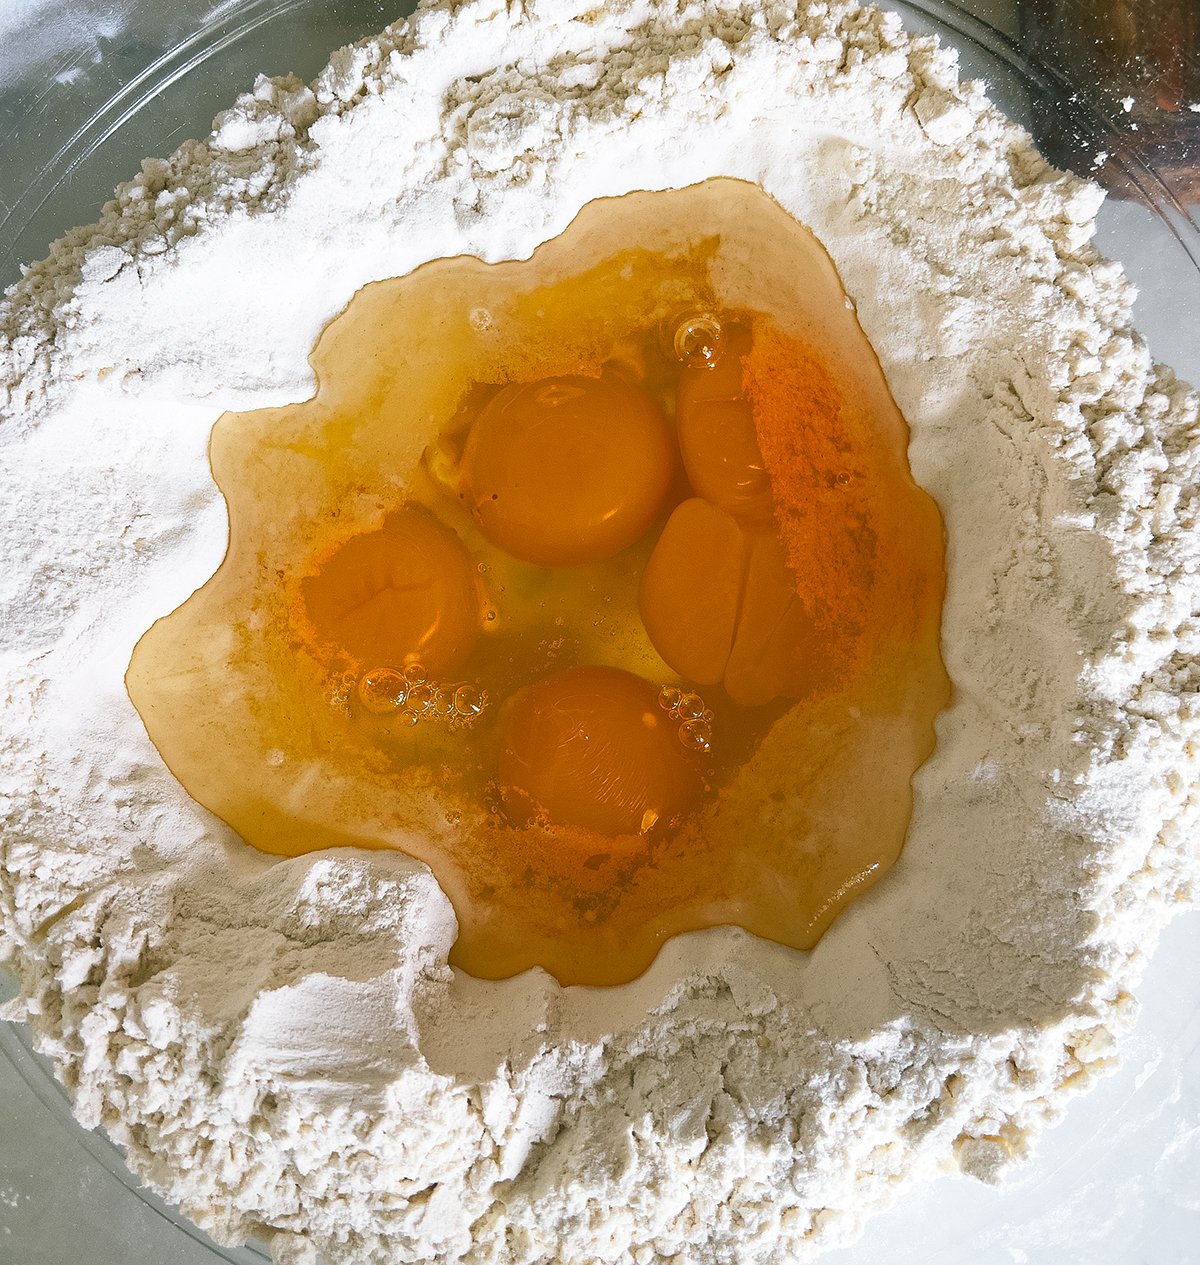
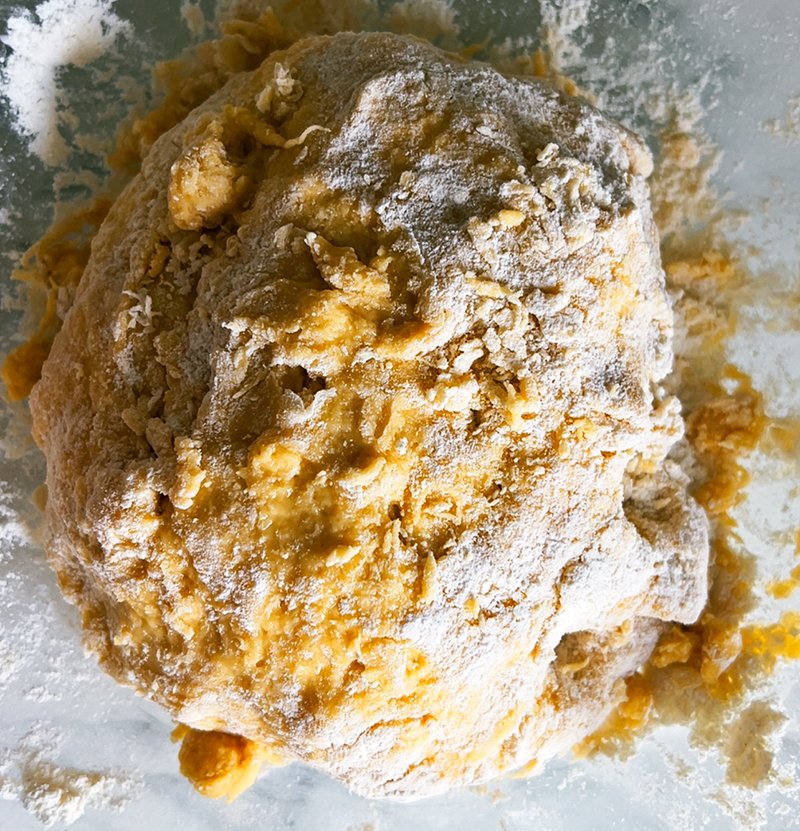
To a large mixing bowl, add your flour, and make a well in the center with your hand. Crack the 4 eggs into the well. With a fork, begin to whisk the eggs, gradually flicking in a little bit of flour from the sides of the well, into the center, at a time. This helps slowly incorporate the flour. When the dough is looking shaggy, but kneadable, turn it out onto a liberally floured surface.
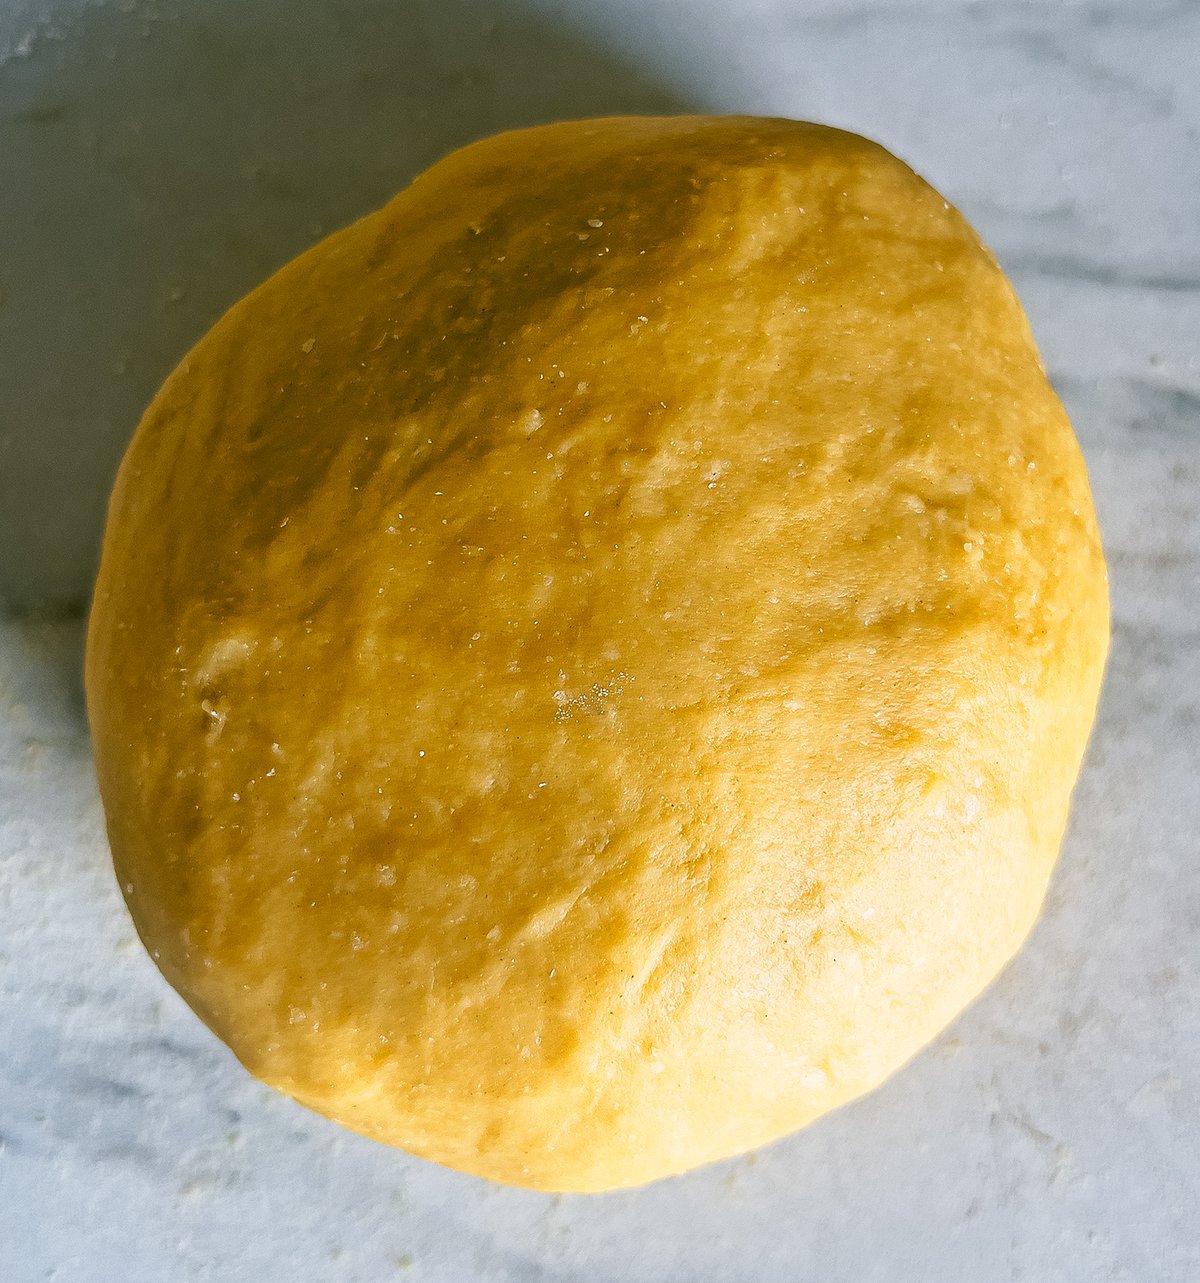
Using the heels of your hands and the weight of your body, firmly press into the dough, folding it on top of itself, and again, pressing into it with the heels of your hands. Do this for 10-15 minutes until the dough is looking beautiful, and feeling soft, supple and workable. For visual example, see photo 3 below.
Wrap the dough in plastic wrap, and allow to rest in the refrigerator for at least 1 hour, but up to overnight. If I have time, I opt for the latter.
Make the filling. Preheat your oven to 400F, and place your cubed butternut squash on a large sheet tray. Drizzle liberally with olive oil, and season generously with salt and pepper. Sprinkle on herbs and crushed red pepper, and toss to make sure everything is evenly coated. Roast for 30 minutes, flipping halfway through, until soft and lightly golden brown.
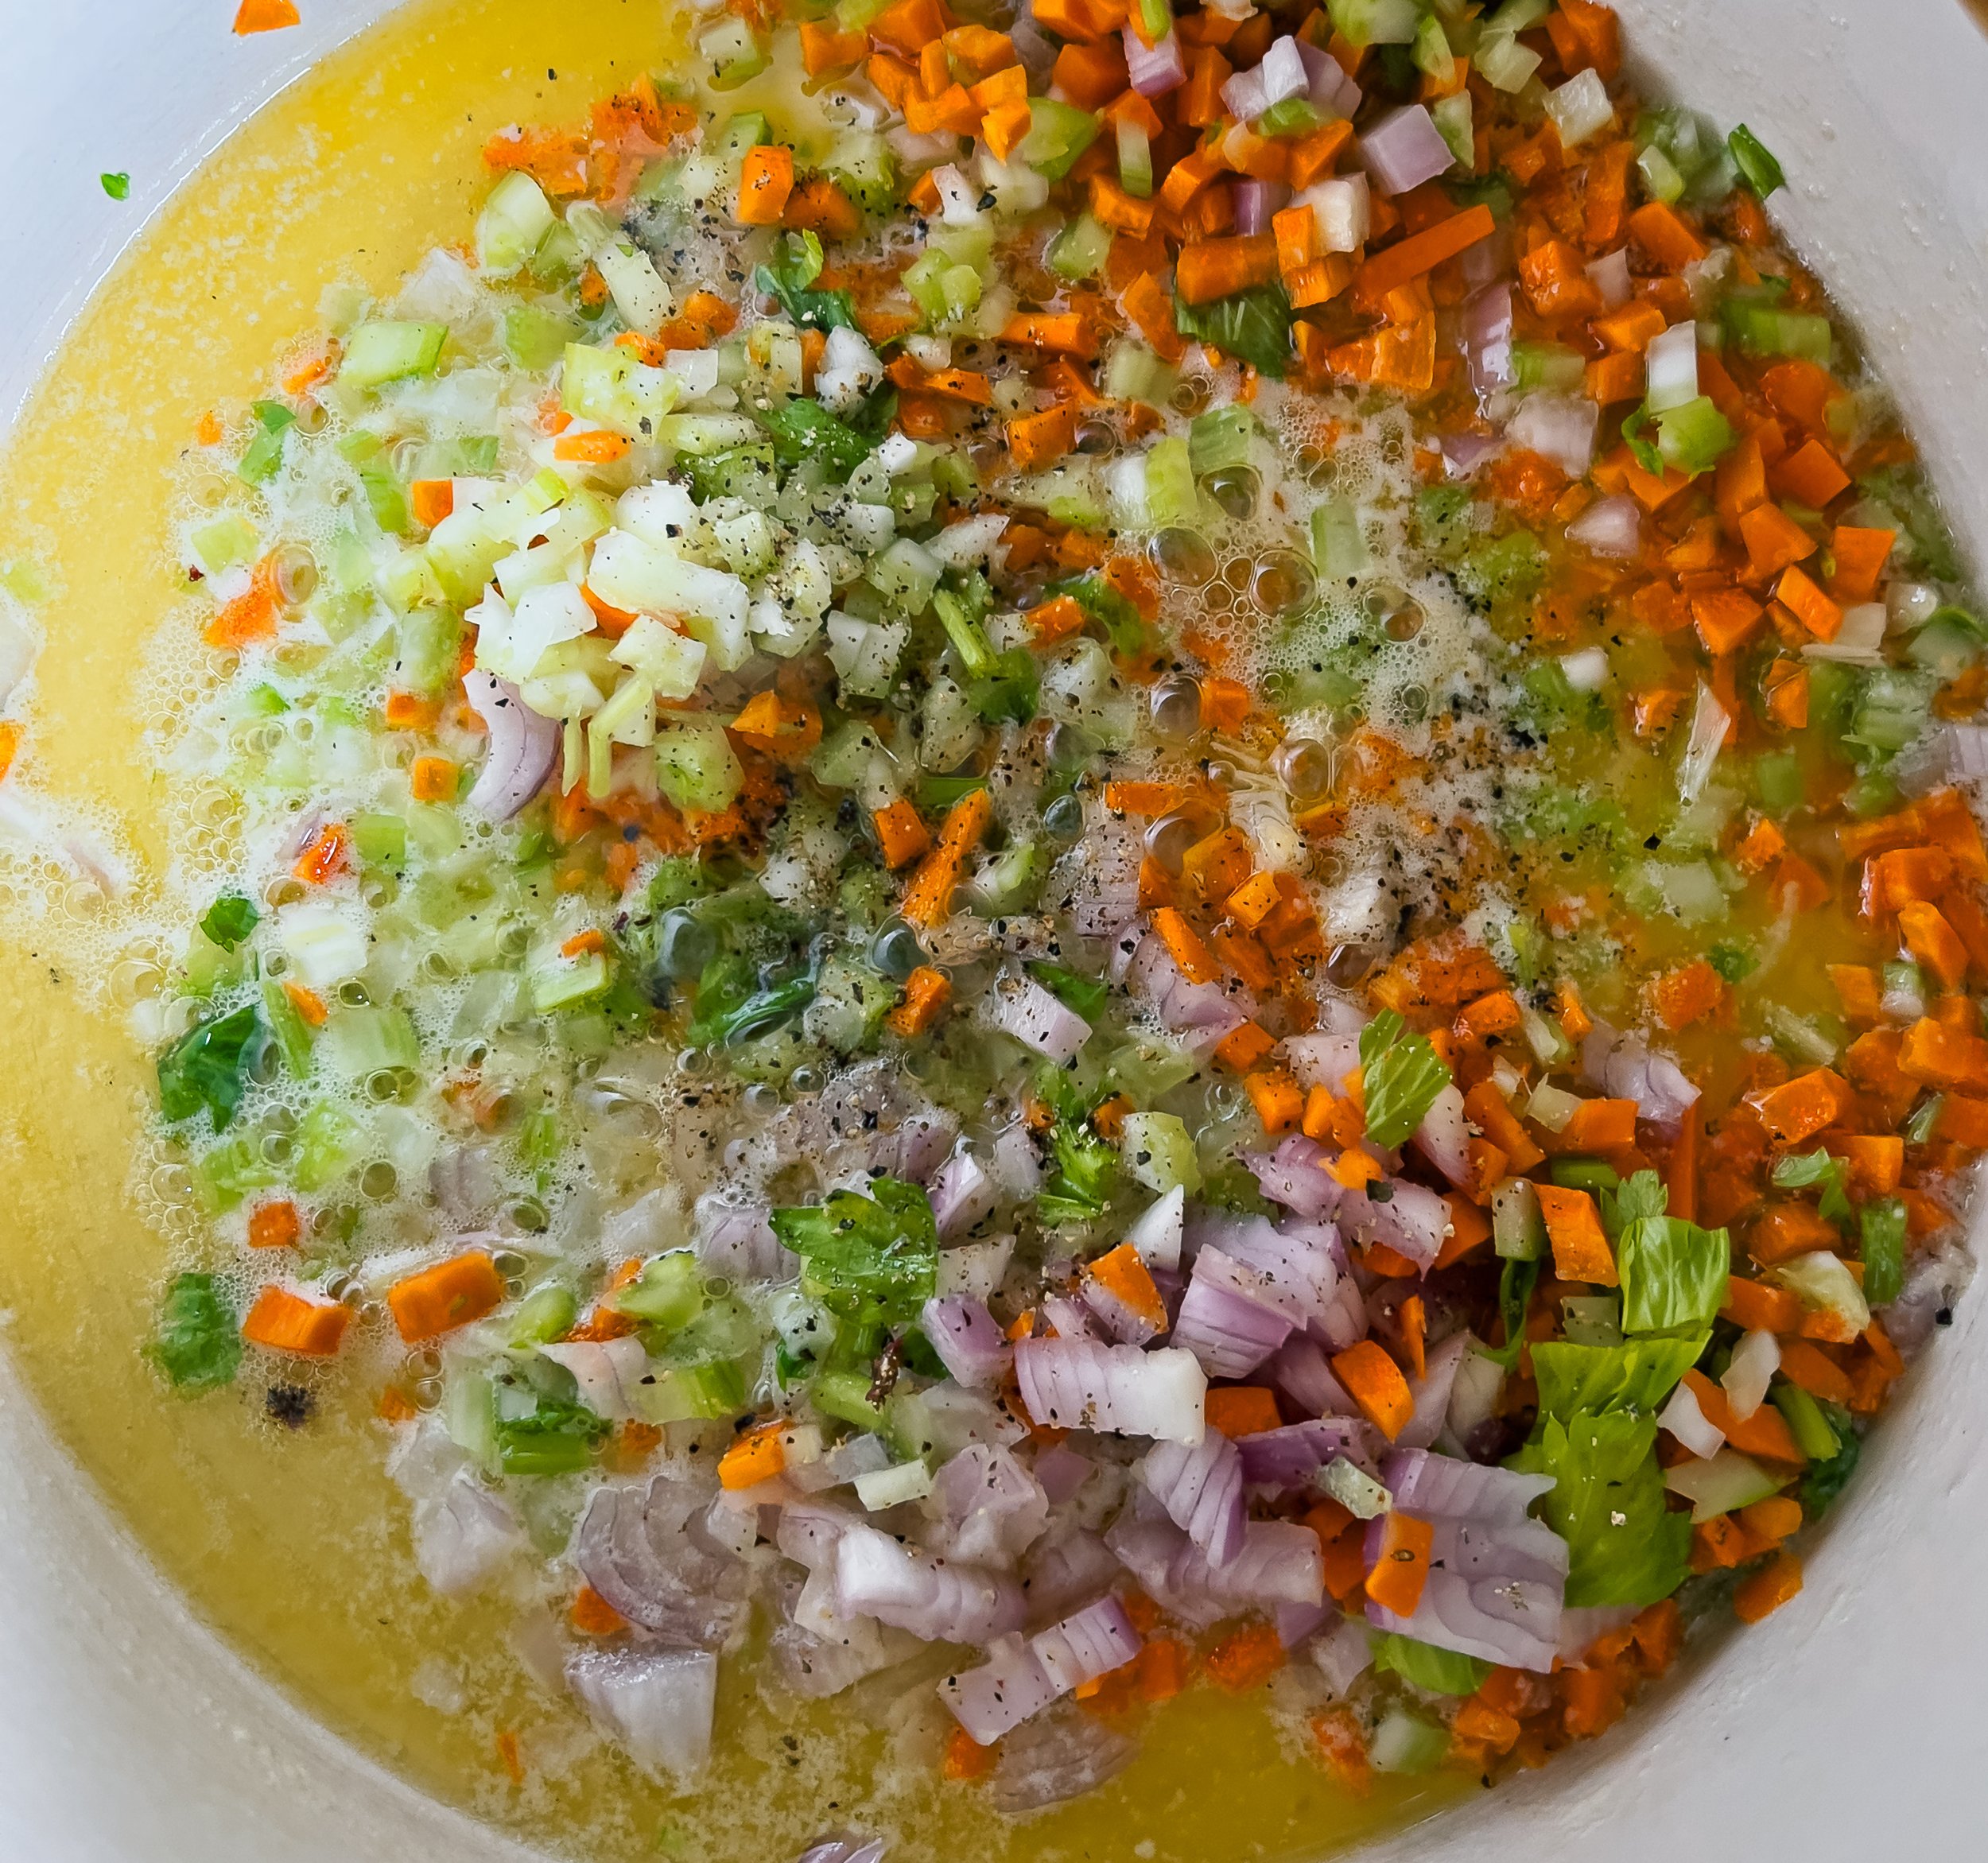
While that’s cooking, crisp up the bacon in a Dutch oven or large sauté pan. Set atop paper towels to drain. Leave fat in the pan, and to that, add your celery, carrot and shallot, along with a sprinkle of salt and pepper. Sauté over medium heat. When everything is getting slightly soft and the shallot is getting translucent, add in the garlic, herbs, and lemon zest and sauté until garlic is fragrant, about 30 seconds. Pour in the wine, sautéing to combine, again, seasoning as we go. Allow to cook in the wine for about another 30 seconds. Turn off the heat.
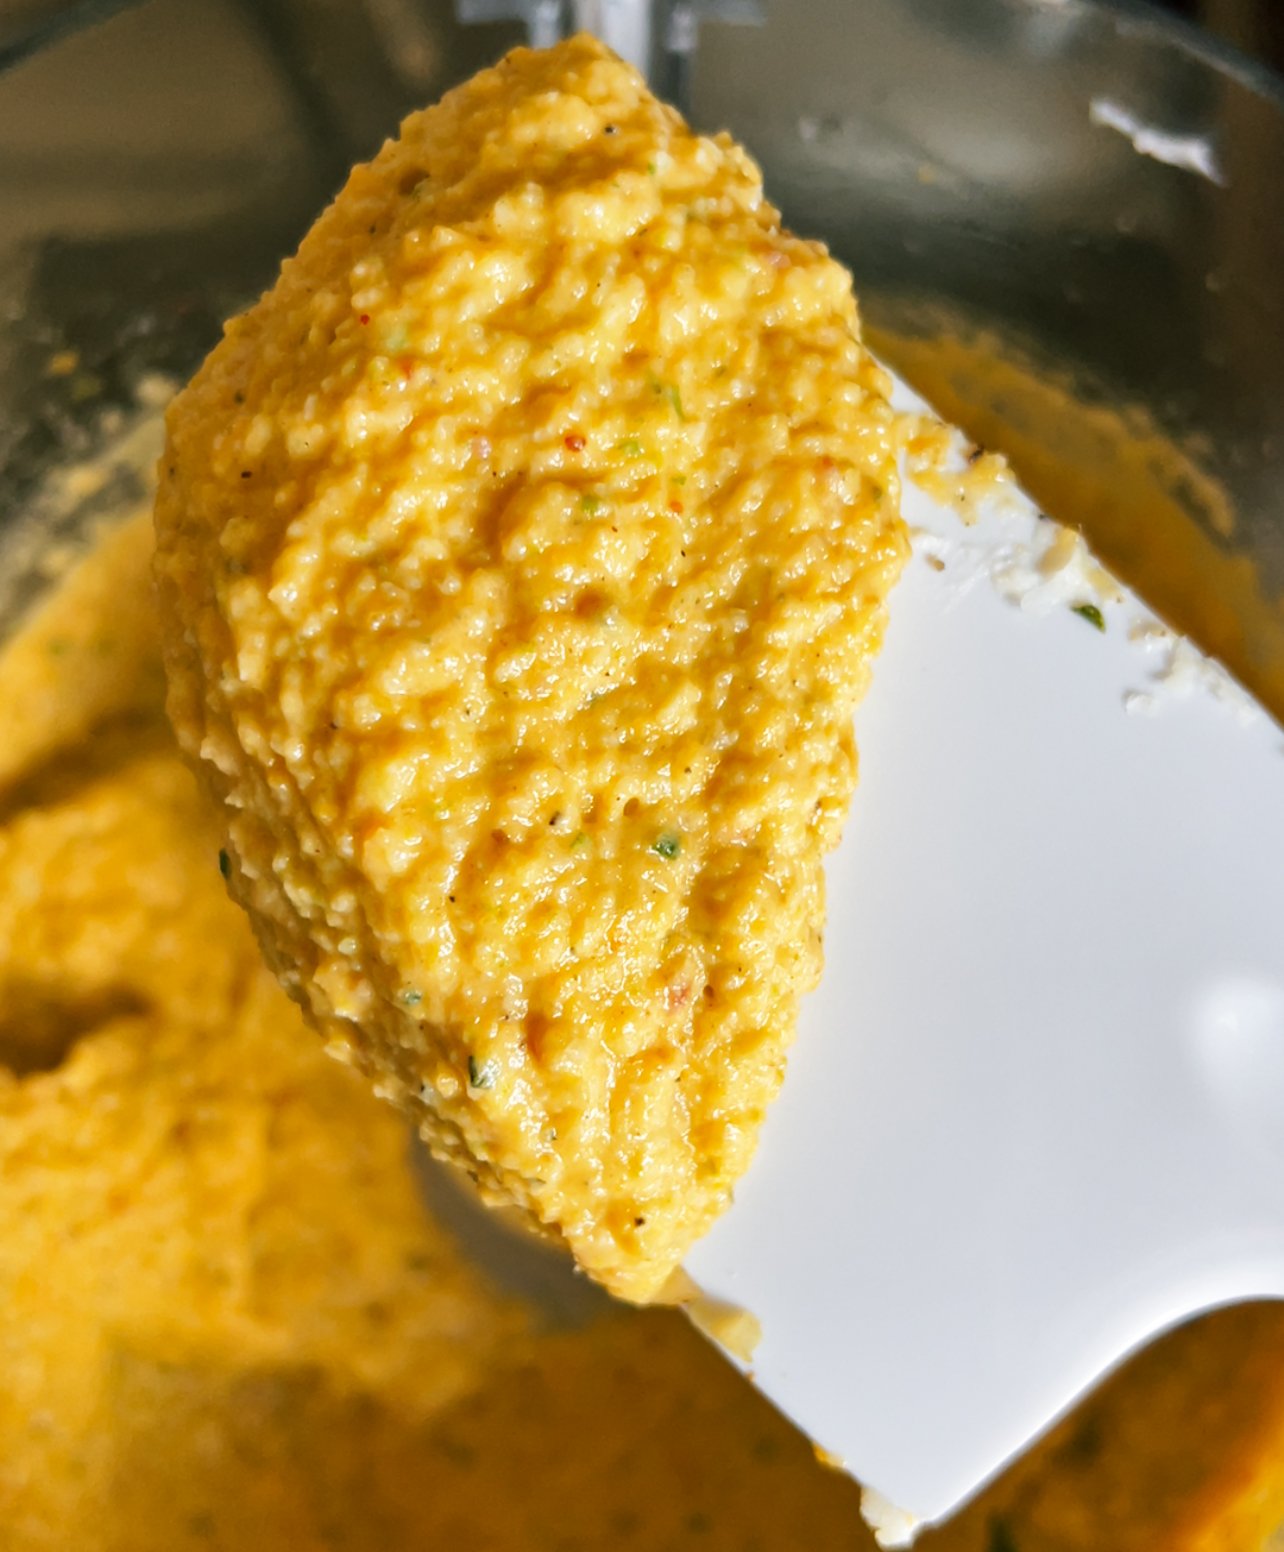
To the bowl of the food processor, add the roasted butternut squash, mirepoix mixture, mascarpone and Parmigiano Reggiano cheeses. Pulse to combine. Transfer to a bowl and set plastic wrap directly atop this mixture. Place in the refrigerator until ready to use.
Roll out the pasta. Cut a piece of dough (about 1/4 of the dough), and form it into a circular puck shape, gently flattening out the edges (the middle will be a little fatter). Place the pasta roller on the lowest setting (usually 0 for manual hand-crank machines, and 1 for a stand mixer attachment). If using an attachment on a stand mixer, turn the mixer on to the lowest setting. Liberally flour the dough, and pass through the machine on the lowest setting. Fold the dough in thirds (like a letter), liberally flour, and pass through the lowest setting again, a second time. Again, fold into the thirds (like a letter), liberally flour, and pass through the lowest setting, again, for a third and final time.
After passing the dough through the lowest setting, turn the pasta roller to the next setting (usually 1 for a manual hand-crank machine, and 2 for a stand mixer attachment). We will no longer be folding the dough after each pass. From here on out, it’s just once through the machine on each setting. Liberally flour your dough, and pass through the machine. Turn to the next setting (usually 2 for a manual hand-crank machine, and 3 for a stand mixer attachment), and pass through the machine. Liberally flour the sheet, turn the machine to the next setting (usually 3 for a manual hand-crank machine, and 4 for a a stand mixer attachment), liberally flour, and pass through the machine.
At this point, you should be able to see your hand through the sheet of dough if you hold it up to the light. You technically could stop here. However, I find that one more pass really creates a pasta that is not too thick, but still can achieve al dente status. With that, turn the dial on the machine once more, to the next setting (usually 4 for a manual hand-crank machine, and 5 for a stand mixer attachment), liberally flour, and pass through once more. Liberally flour this sheet, and set aside while finishing the rest of the dough. Repeat the process, 1/4 of dough at a time.
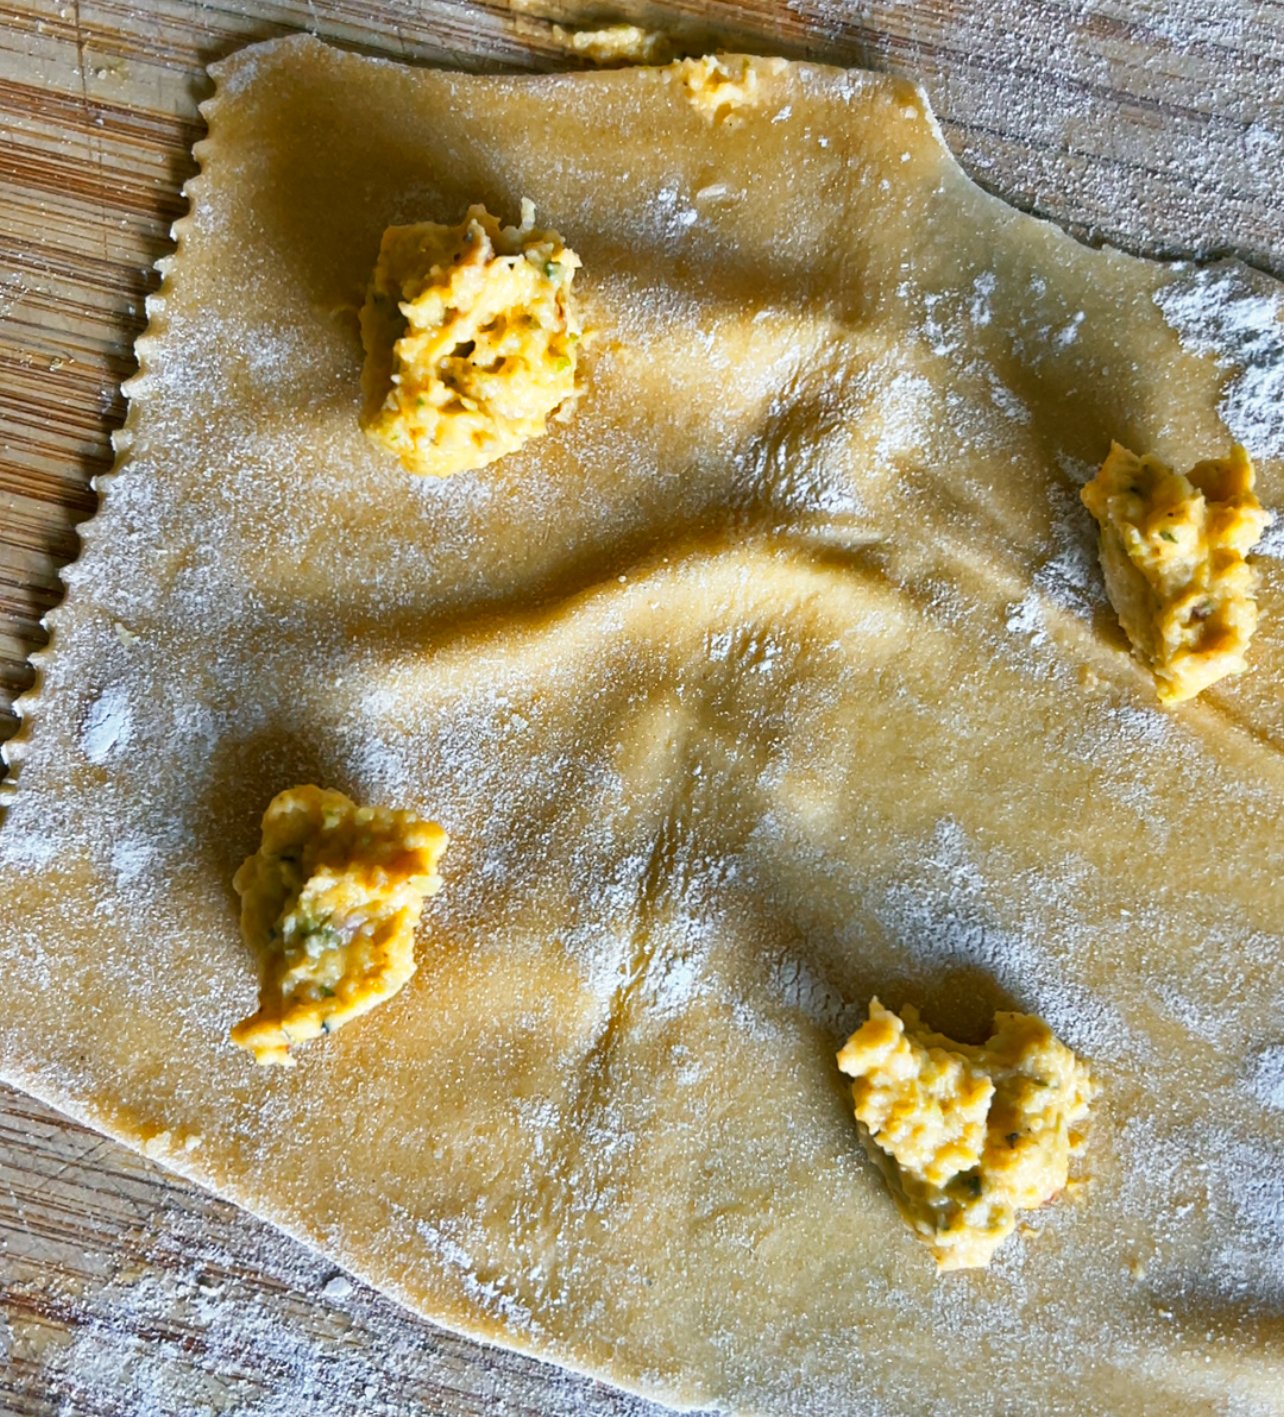
Place a sheet of dough atop a liberally floured surface. Optional: with a fluted cutter, trim the edges of the sheet. This is just for aesthetics, and is totally not necessary. However, if you skip this step, just trim any crazily uneven edges of your pasta sheet. Using either a 1/4 teaspoon, or your finger, which I find easier, dot your filling across the sheet of dough. See photo 6 below. We are trying to achieve squares of dough that are about 3” x 3” in size. Using a fluted rotary cutter or a knife, cut the dough into even squares. Use the filling as a guide for where to make your cuts.
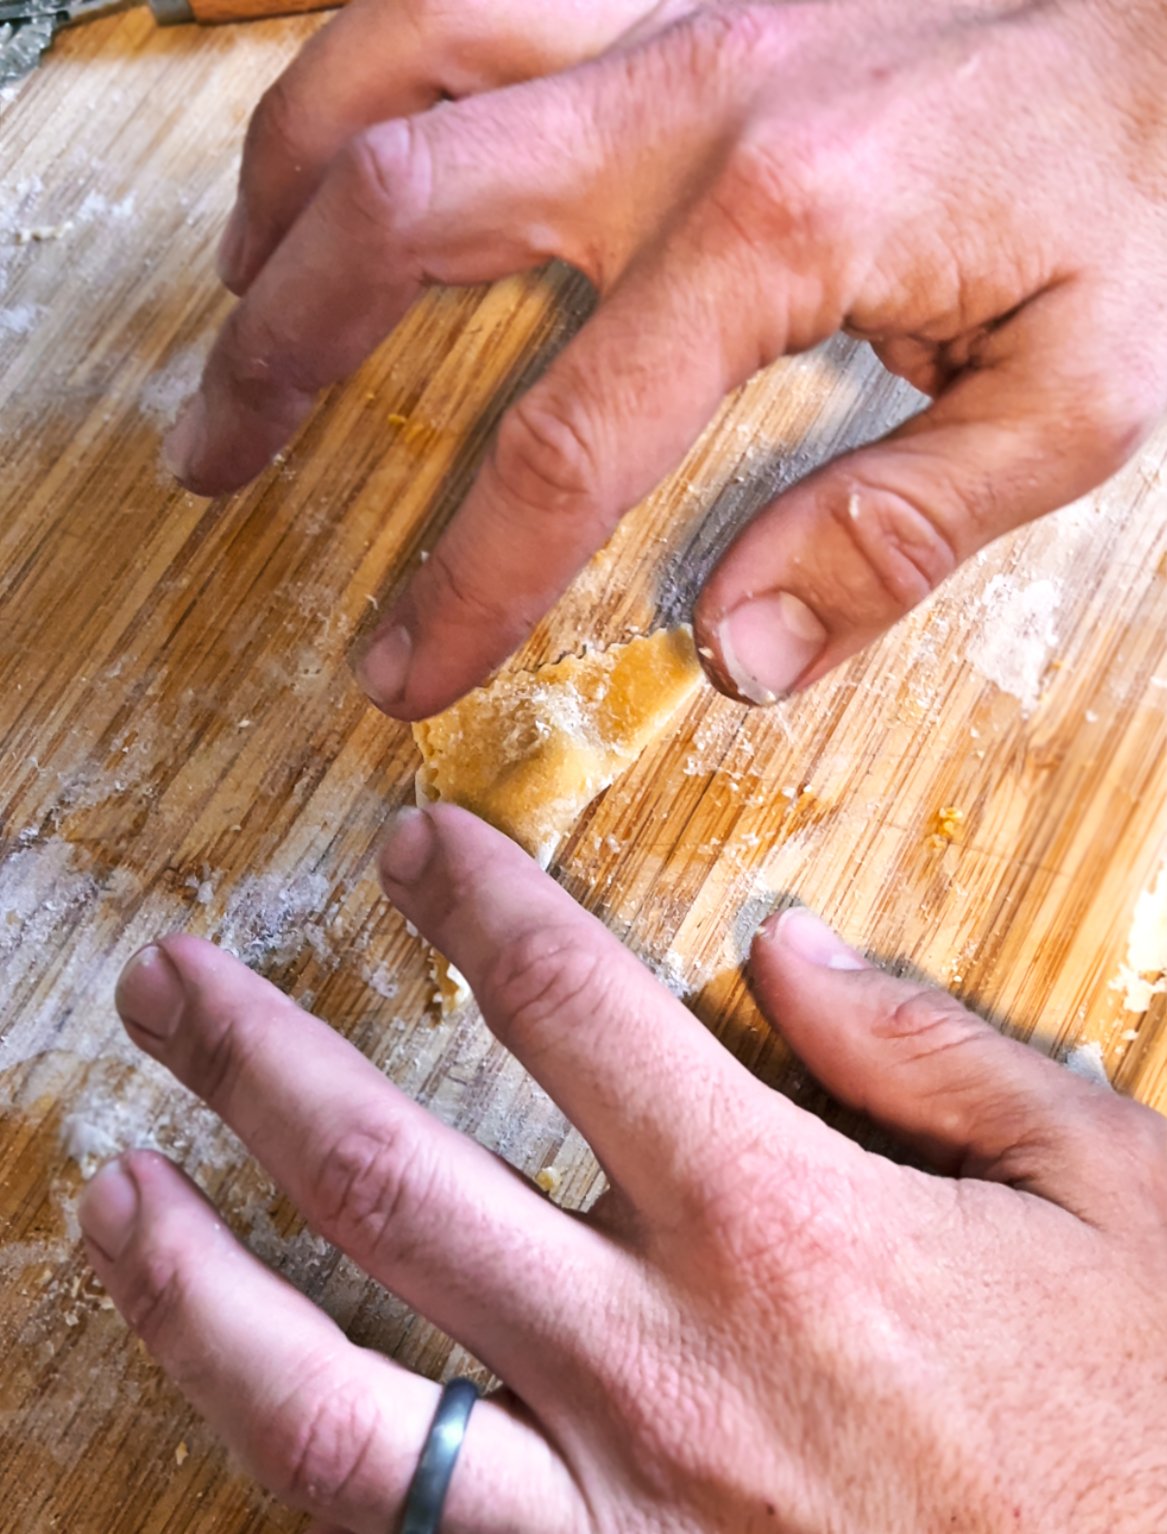
Dip your finger in water and gently wet the border of the 3” x 3” square. Gently fold diagonally, corner to corner, gently pressing out the excess air around the filling. This is a very important step. Not doing this could result in the tortellini bursting in the boiling water while cooking. See photo 7. Dip your finger in the water again, and dot a small amount on one corner of the tortellino. Pick up the tortellino, and cross the two pointed ends over each other (Think about stretching and crossing your arms over your head), gently pressing one corner atop the corner dotted with water to adhere.
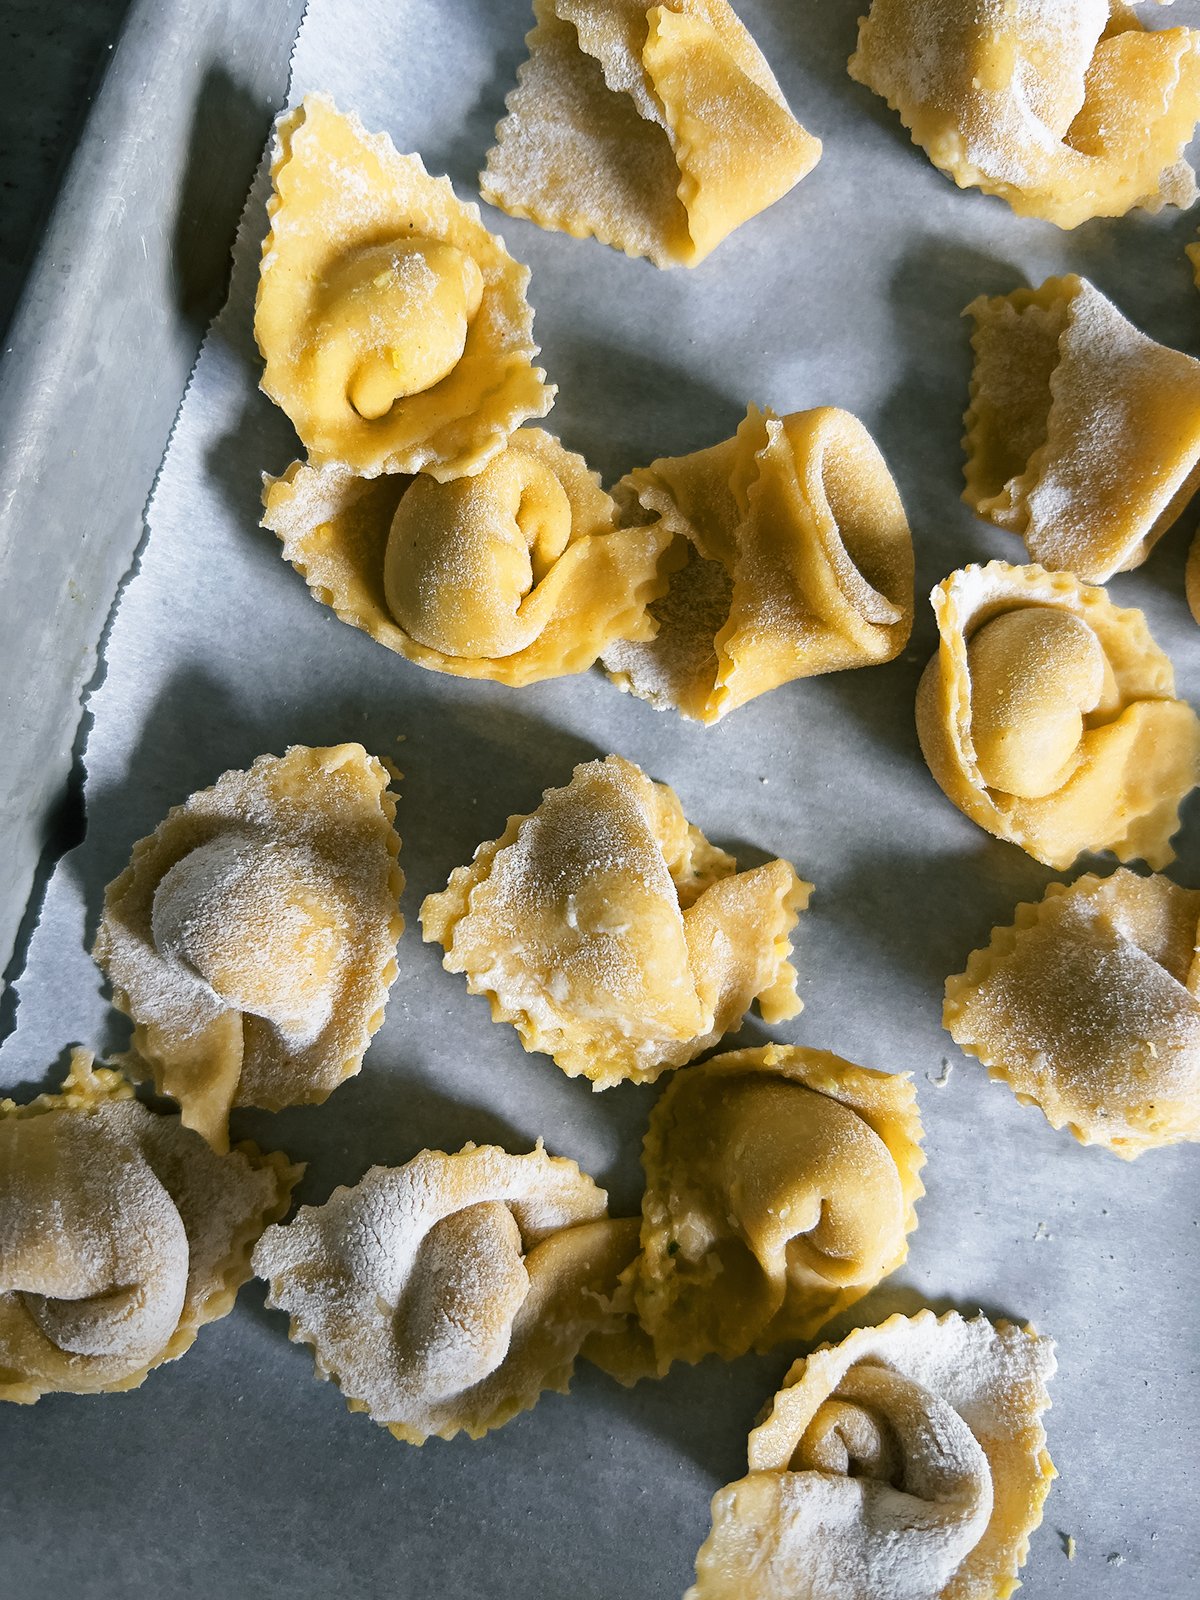
Place finished tortellini atop a parchment-lined sheet tray, dusted with flour.
To cook, boil in liberally-salted water for under 2 minutes and finish in sauce of your choice. Serve with lots of Parmigiano Reggiano.
Trust the process.
Eggs in the flour well.
Shaggy dough formed together, ready for 10-15 solid minutes of kneading.
Mirepoix getting sautéed to be combined with the butternut squash, bacon, and other ingredients for the tortellini filling.
Butternut squash filling post food processing, ready to get chilled while the pasta gets rolled.
A fresh, trimmed sheet of pasta with filling in place, ready to get cut into squares, then shaped.
My husband, Ben, shaping a tortellino. We fold corner-to-corner, diagonally, then gently press the air out around the filling, so we have a nice, tight, half-moon shaped pocket of filling.
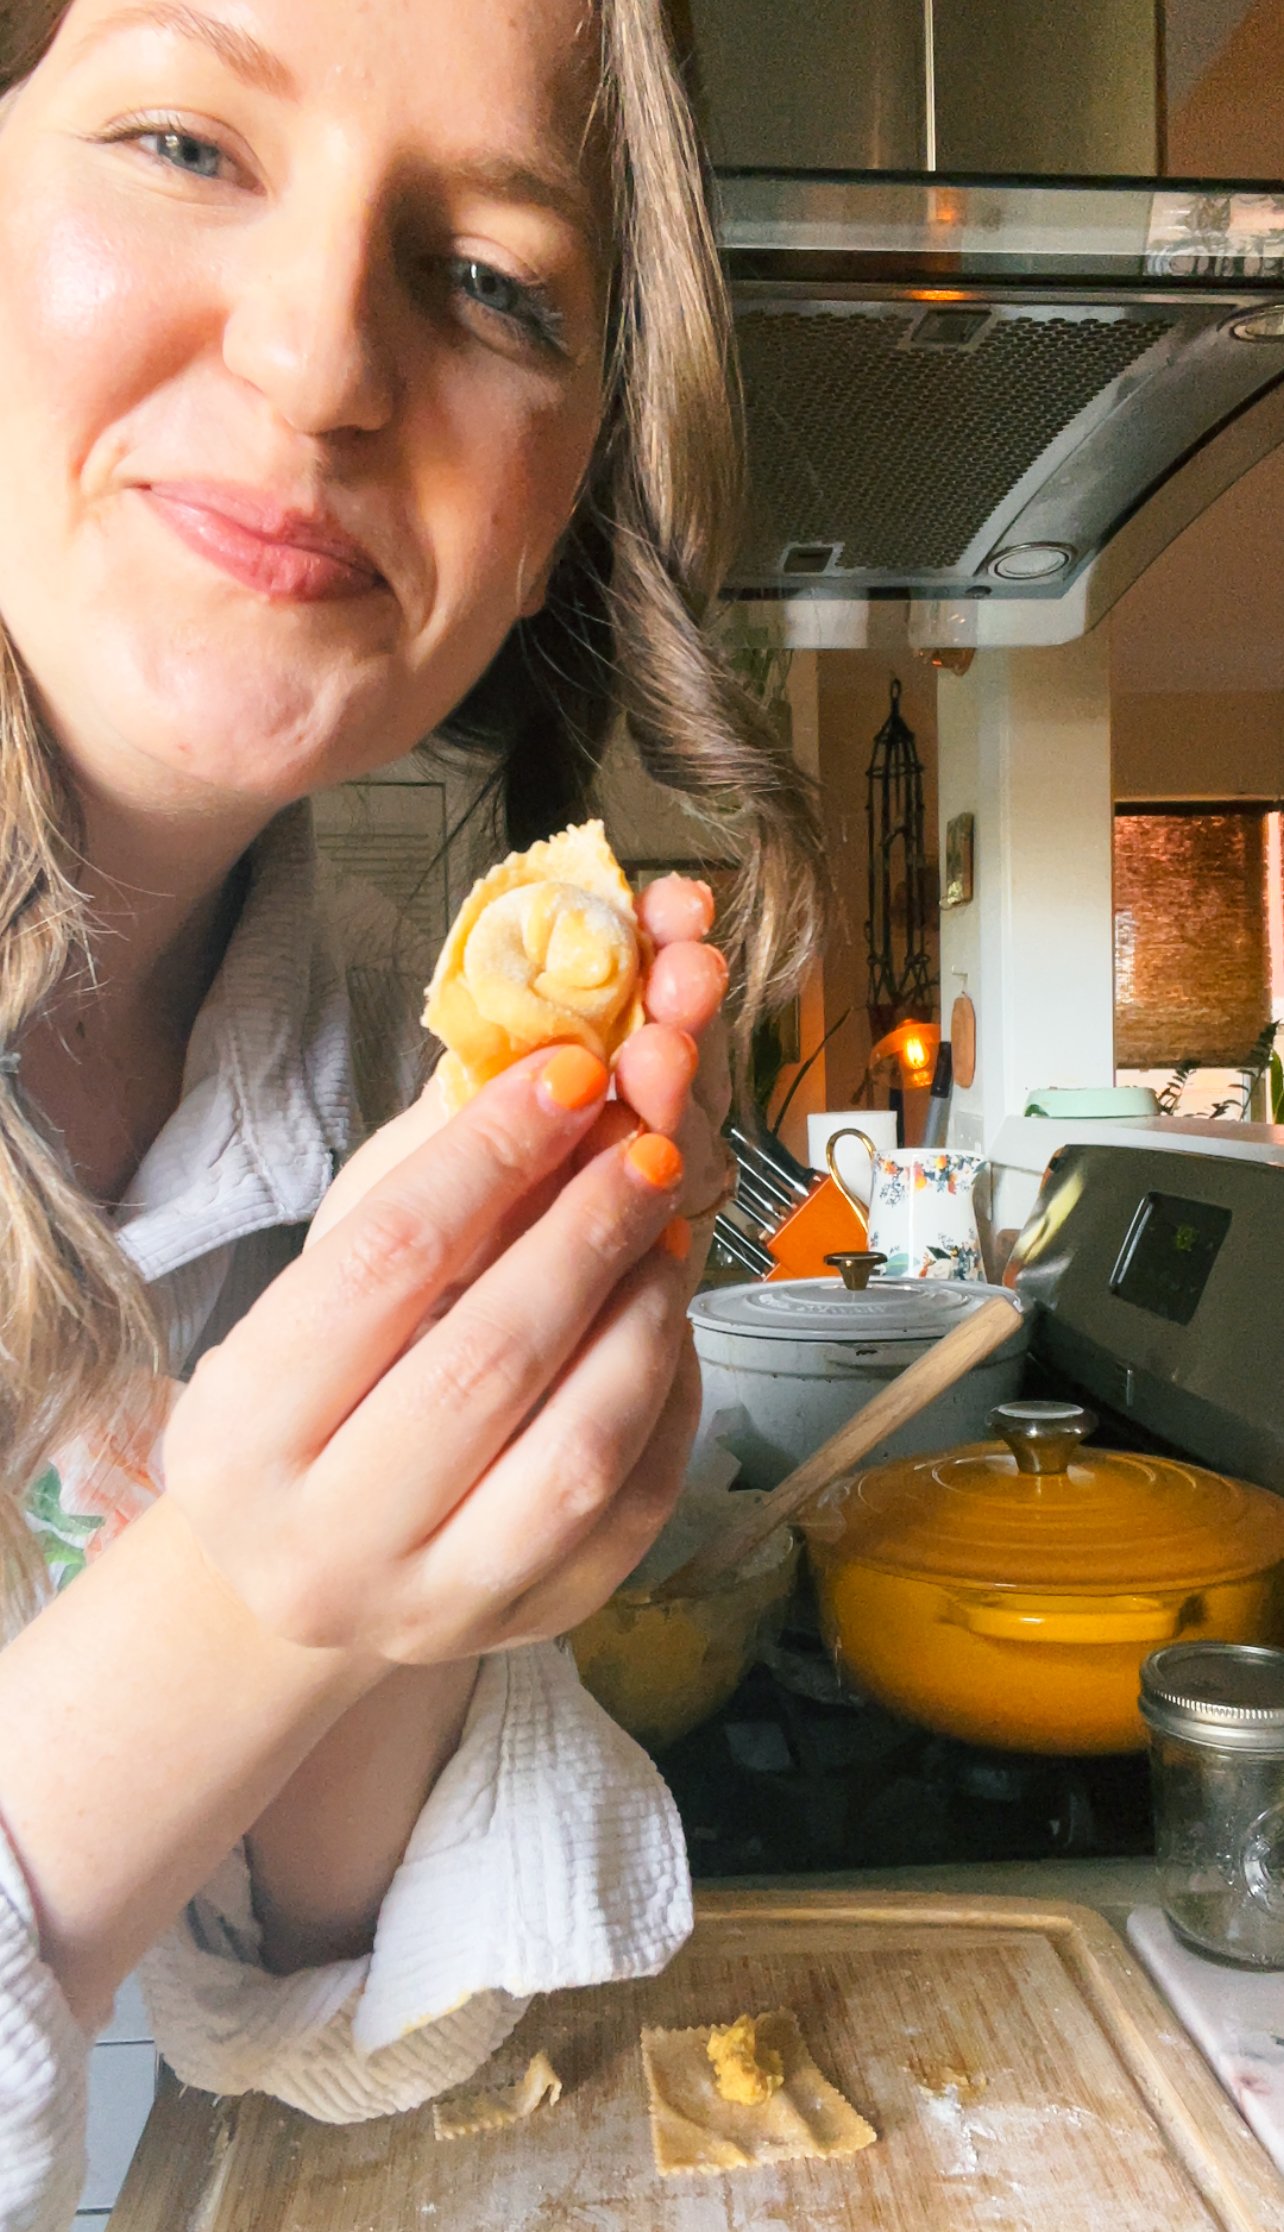
A fully-formed tortellino is born! After step 6, we simply take the two outer points of the tortellino, cross them over each other, gently pressing to adhere.
Beautiful tortellini ready to go.

These are one of my favorite bites of fall. Al dente fresh pasta, filled with a slightly caramelized, smoky, herbaceous filling. The backbone of the mirepoix that gets sauteéd in wine seriously compliments the roasted, sweet butternut squash so very well. I often find that squash dishes can be kind of one-note, because no matter what you do to them, you bring out their sweetness- which is great, if there’s enough going on to balance it all out. I think this dish has that.
To serve, butternut squash never met a browned butter it didn’t like. The day I made this, I sauteéd up some mirepoix (carrot, celery, shallot), along with garlic, browned butter, a little wine, and chicken stock, plenty of salt and a really good pinch crushed red pepper, because the hint of spice really levels up this dish. I also crisped up some sage (Literally just heat some oil, and gently place in sage, and allow to crisp up for not even 1 minute). Place atop the pasta that we finish in the sauce, dust with tons of Parmigiano, and we are truly living in an autumnal mood. If you're feeling extra-extra, throw some toasted pepitas atop this situation like I have here. The nutty crunch is the perfect compliment to the creamy filling, and come on, pepitas and squash? Match made in heaven.
I really do hope that if you’ve ever been curious about attempting fresh pasta, you take the plunge. It might not be the quickest process, but it’s such a valuable skill to learn, and truly, nothing tastes better than the first bite of something you’ve poured that work into. If you do attempt this, or any fresh pasta, I’d love to see pics.
With that, I’m off to take my coffee outside, because it’s almost 10, and not even 70 degrees- fall is here, baby!

